
DIY Golf Simulator Shed: Plans, Size & Build Guide
- Jul 2
- 10 min read
A backyard golf simulator shed gives you year-round golf about 30 feet from your back door. No tee times, no weather delays, no driving across town. The catch is that most shed plans were never drawn for a golf swing, and most golfers underestimate how much room a driver actually needs.
This guide fixes that. We are the manufacturer, so we size enclosures and impact screens to real rooms every week. Below you will find honest golf simulator shed plans guidance, the exact dimensions that work, and a build sequence you can follow whether you are going full DIY or buying a kit. Want us to size the build for your yard instead? Get a custom quote and a specialist will lay it out, free.
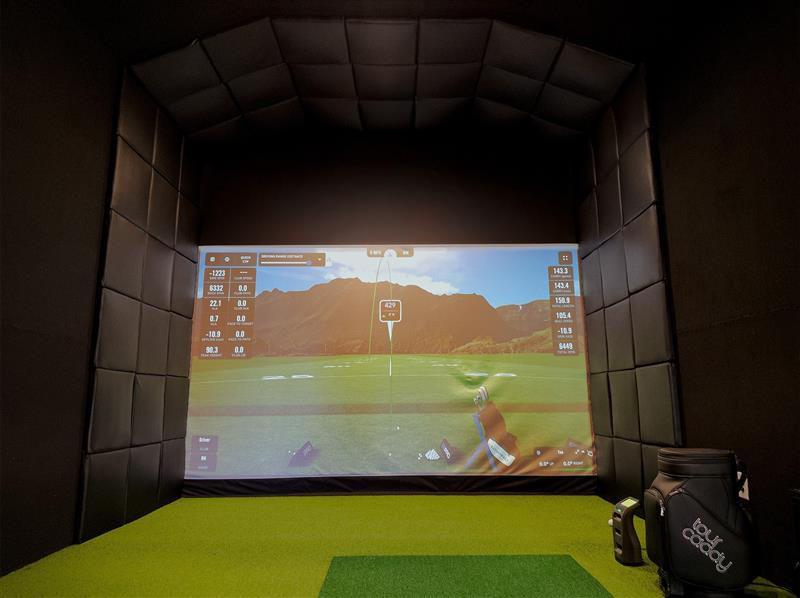
Why a Golf Simulator Shed Beats a Spare Room
A dedicated shed solves the problem that kills most home builds: space. Garages have low ceilings and a parked car. Basements fight moisture and headroom. A backyard shed lets you set the dimensions before a single wall goes up.
You also get a clean room. No HVAC ducts crossing the swing path, no support post in the wrong spot, no compromise on screen size. The whole structure exists for golf, which means you can build the ceiling height and width that a full swing actually demands.
There is a financial angle too. A purpose-built shed costs far less than a home addition, and it adds a usable structure to your property. For many golfers the shed pays its way as a year-round room the family uses for more than golf.
Golf Simulator Shed Size: The Dimensions That Actually Work
Sizing is where DIY builds succeed or fail. Get the footprint right and everything else is straightforward. Get it wrong and you are rebuilding a wall to fit the screen.
Three measurements drive the entire build: width, depth, and ceiling height. Width sets your swing freedom. Depth sets the distance from the hitting mat to the screen plus a safe gap. Ceiling height is the one most people shortchange, and it is the hardest to fix later.
Recommended golf simulator shed dimensions
Here is a practical sizing table built from common industry build guidance and what we see fit real sim packages. Use it as a planning baseline, then confirm against your launch monitor and your own height.
Build tier | Width | Depth | Ceiling height | Best for |
Compact (tight budget) | 10 to 12 ft | 14 to 16 ft | 8.5 to 9 ft | One player, often off-center for a single dominant hand |
Comfortable (recommended) | 14 to 15 ft | 18 to 20 ft | 9 to 10 ft | Most home builds, full swing without thinking about walls |
Spacious (entertaining) | 16 ft+ | 20 to 24 ft | 10 ft+ | Left and right handed players, seating, multi-use room |
A few rules worth knowing before you commit:
Ceiling height is non-negotiable. Tall players swinging a driver need roughly 9 to 10 feet of clear height. If the ceiling is too low you will clip it, and there is no cheap fix once the roof is on.
Width controls handedness. Around 15 feet of interior width lets a right and left handed golfer share the room without moving the mat. Under that, you typically set up off-center for one dominant hand.
Depth covers the swing plus the screen gap. You want room for your stance and follow-through, plus a buffer between the hitting area and the impact screen so the ball decelerates safely.
What size shed do you buy for these interior numbers?
Remember that a shed's listed size is its outside footprint. Framing, insulation, and interior finish eat into that. A nominal 12x20 shed is a realistic starting point for a single player, while a 14x24 or 16x30 gives the comfortable clearance most golfers wish they had built the first time.
If your lot or budget forces a smaller footprint, that is fine. We custom-fit enclosures down to the inch, including off-center layouts for narrow rooms. Send us your numbers and we will tell you honestly what fits. That is the point of talking to the people who build the gear.
Golf Simulator Shed Plans: Buy, Adapt, or Draw Your Own
You have three real paths to a set of plans. Each works. The right one depends on your construction skill and how much you want to figure out yourself.
Buy purpose-drawn shed plans. Several companies sell architectural golf shed plans with the ceiling height and depth already set for a swing. These remove the guesswork and usually include a materials list. Good fit if you can build but do not want to design.
Adapt a standard shed plan. Plenty of free and paid generic shed plans exist. You can stretch one to golf dimensions, but you have to redo the ceiling height, the door placement, and the wall framing yourself. Cheapest route, most room for error.
Have the sim sized first, then build to it. This is the path we recommend and the one resellers cannot offer. We design the simulator (enclosure, screen, projector, mat) and hand you the exact interior clearances the shed needs. You or your builder frame the structure around real numbers instead of a guess. One vendor, no two-project mismatch where the shed and the sim never line up.
However you get your plans, every good golf simulator shed plan locks in the same things: clear ceiling height, swing width, mat-to-screen depth, a door wide enough to move gear, and a power plan. Miss one and you pay for it during install.
How to Build a Golf Simulator Shed: Step by Step
This is the build sequence we walk customers through. Treat it like a pre-shot routine. Skipping steps is how projects blow past budget.
Step 1: Lock your dimensions and plan
Pick your build tier from the table above. Map the footprint in your yard with stakes and string so you can stand in it and take a practice swing in your mind. Confirm your launch monitor's space requirements, since camera units and radar units want different placement. Set a budget that covers both the structure and the sim, not just the four walls.
Step 2: Check permits and your HOA
Call your local building department before you dig. Accessory structures often need a permit, and the rules change by town and by shed size. If you have an HOA, get the exterior style and footprint approved in writing. We provide build specs, dimensions, and material info so you have what the reviewer asks for. We work with your contractor and HOA, not against them.
Step 3: Pour the foundation and frame
A level foundation is non-negotiable. A tilted floor throws off launch monitor readings and stresses the frame. Most builds use a concrete slab or a pressure-treated wood platform. Frame the walls and roof to your locked ceiling height, and build the structure tough enough to shrug off a shanked drive into a wall.
Step 4: Run power and lighting
Most sims run on standard outlets. Plan a few well-placed circuits for the launch monitor, projector, computer, and lights, and keep cords out of the swing path. If trenching power to the shed is a hassle, some DIY builders run a solar plus battery setup instead. Plan lighting in two layers: focused light at the hitting area so the launch monitor reads cleanly, and softer ambient light for the rest of the room.
Step 5: Insulate and finish the interior
If you want to play in January and July, insulate the walls and ceiling and add a small heater or mini-split. Insulation also protects the electronics, which dislike temperature swings. Finish with drywall or panel, then lay flooring. Interlocking foam tiles plus turf around the hitting mat is a cheap, joint-friendly surface that also dampens sound.
Step 6: Install the enclosure, screen, and projector
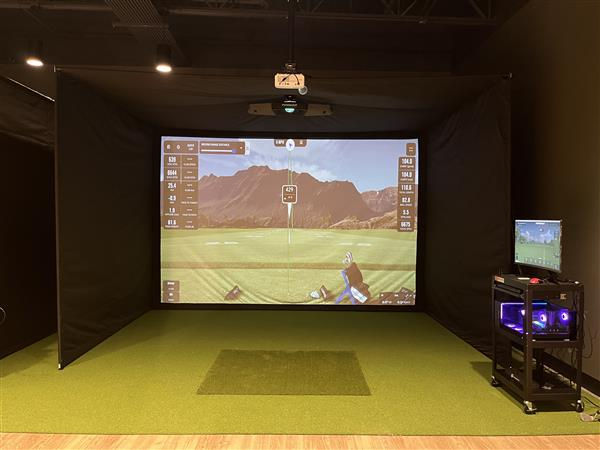
Mount the impact screen flat and tensioned inside the enclosure frame so it absorbs full driver swings and gives a clean image. Position the projector to fill the screen without your body casting a shadow. Set the hitting mat at the planned depth from the screen. This is the stage where a custom-fit enclosure pays off, because it was built to your exact interior, not trimmed to fit.
Step 7: Calibrate and play
Connect the launch monitor, projector, and computer, then run the software's calibration so ball speed, launch angle, and spin read accurately. Hit a few shots, compare the on-screen ball flight to what you felt, and fine-tune placement. Tidy the cables, add wall padding where stray shots could land, and you are open for business.
DIY vs. Kit vs. Turnkey: Which Build Is Right for You?
Not every golfer should swing a hammer, and not every golfer should pay for full install. Here is the honest trade-off.
Full DIY. You build the shed and assemble the sim yourself. Lowest cost, total control, the most work and the most room for sizing mistakes. Best for confident builders.
DIY-friendly kit. The shed or the sim ships with instructions and support so you assemble without designing from scratch. A solid middle ground. Our enclosure kits, for example, are built to assemble quickly because they are cut to your room before they ship.
Turnkey build. We design and deliver the shed and the sim, install it, and hand you a finished room. Highest cost, fastest path, zero guesswork.
Most people land in the middle. They want the savings of doing some of it themselves but do not want to gamble the whole project on a ceiling-height miscalculation. That is exactly why we offer both kits and turnkey, and why the design consult is free either way.
What Goes Inside: The Simulator Build
The shed is half the project. The simulator is the other half, and the two have to be planned together. These are the core components:
Impact screen. Catches the ball and shows the course. A real one is built to take full driver swings, over and over, without wearing through. Net setups are cheaper but you lose the projected image.
Enclosure or frame. Surrounds the screen and hitting area, holds the screen flat, and protects the walls. Custom-fit framing is what keeps the picture clean and the room safe.
Projector. Fills the screen with a bright, sharp image. A short-throw model helps in tighter rooms.
Launch monitor. The brain of the system. It tracks ball speed, spin, launch angle, and club data. Choose this first and build the rest around it.
Hitting mat. A forgiving surface that protects your joints and your clubs.
Computer and software. Runs the courses and the data.
Wall padding and accessories. Side pads and baffles stop stray shots from finding drywall.
We build packages around the major launch monitors, including SkyTrak, Bushnell, Garmin, Foresight, and Trackman, and we size the golf bay enclosure and impact screen to whatever room you end up with. Because we make the screens and enclosures ourselves, there is no reseller markup baked into the build.
Cost Factors for a Golf Simulator Shed
We do not publish a single price because no two builds are the same, and any number you see online is a guess until someone asks your dimensions. What we can do is show you what drives the cost so you can plan honestly.
The structure is one bucket: foundation, framing, insulation, climate control, electrical, and finish. A bigger or insulated shed costs more, and a slab costs more than a simple platform. The simulator is the second bucket: the screen, enclosure, projector, mat, and especially the launch monitor, which is the widest price swing of any component.
Two levers move your total most:
How much you DIY. Doing the build labor yourself is the biggest single saving. A kit splits the difference.
Who you buy the sim from. Factory-direct pricing on the screen and enclosure removes the reseller margin that gets stacked onto the same gear elsewhere.
For a real, itemized number on your build, request a custom quote and we will break out the shed, the sim, and the install so you see exactly where the dollars go.
Common DIY Golf Simulator Shed Mistakes
We see the same avoidable errors over and over. Dodge these and your build goes smoothly.
Ceiling too low. The number one regret. Build to clear a full driver swing, not to clear your head.
Width too tight for your stance. A cramped room makes you swing scared. Give yourself room, and plan for both hands if friends play.
Buying mismatched gear piecemeal. A projector that does not suit the room or a screen sized wrong for the enclosure costs more to fix than to plan. Size the components together.
Skipping insulation. A shed with no climate plan gets used three months a year and bakes your electronics the rest.
Forgetting the permit. Building first and asking later can mean fines or a teardown.
Frequently Asked Questions
What size shed do I need for a golf simulator?
A nominal 12x20 shed is a realistic minimum for one player, but a 14x24 or larger feels far more comfortable. Inside, aim for about 14 to 15 feet of width, 18 to 20 feet of depth, and 9 to 10 feet of clear ceiling height for a full swing. If your space is tighter, an off-center, single-hand layout can work, and we custom-fit enclosures down to the inch for odd rooms.
What ceiling height do I need to build a golf simulator shed?
Plan for roughly 9 to 10 feet of clear interior height so a taller golfer can swing a driver without clipping the ceiling. This is the dimension people most often shortchange, and it is the hardest and most expensive to change after the roof is framed. Build the height in from the start.
Can I build a golf simulator shed myself?
Yes. Many golfers build a golf simulator shed as a DIY project, and the structure is within reach for a confident builder. The two areas where DIY trips people up are sizing the room to the swing and matching the sim components. A DIY-friendly kit or a free design consult removes both risks while keeping the project hands-on.
Do I need a permit to build a golf simulator shed?
Usually, yes. Most areas require a permit for an accessory structure, and the rules vary by town and by shed size. Call your local building department before you dig, and check your HOA if you have one. We supply the build specs, dimensions, and materials info you need to apply.
How do golf simulator shed plans differ from regular shed plans?
A standard shed plan is drawn for storage, so the ceiling is often too low and the layout ignores swing clearance. Golf simulator shed plans set a taller ceiling, enough width for a full swing, the right mat-to-screen depth, and a door big enough to move gear. The cleanest approach is to size the simulator first, then build the shed to those exact interior numbers.
Can I use a golf simulator shed year-round?
Yes, if you plan for it. Insulate the walls and ceiling and add a small heater or a mini-split, and the room stays comfortable in winter and summer. Climate control also protects the launch monitor and projector from temperature swings. Build it in from the design phase rather than bolting it on later.
Start Your Golf Simulator Shed Build
A backyard golf simulator shed is one of the best home golf decisions you can make, as long as the room is sized for the swing and the sim is matched to the room. Get the dimensions right, follow the build sequence, and you will be hitting balls year-round in a space built for it.
You do not have to figure out the sizing alone. We are the manufacturer, we make the enclosures and screens, and we will size the whole build to your yard. Browse our custom golf sheds to see finished builds, or design your golf shed with us and a real specialist will send an itemized design within one business day. No commitment, no chatbot, just the people who build it.


Comments